The Service Setup screen in Agendize is designed to allow you to fully customize the details and settings of your services, based on your needs and those of your customers.
If you require any further assistance, please do not hesitate to contact our support team.
This article will guide you through the steps involved in setting up a service in Agendize using the service settings screen.
Accessing the service settings screen
To get started, go to the left-hand side menu of your Agendize interface and select Settings>"Location's Name" > Service>"Service Name". This will take you to a screen where you can add and configure the details of a service.
General information
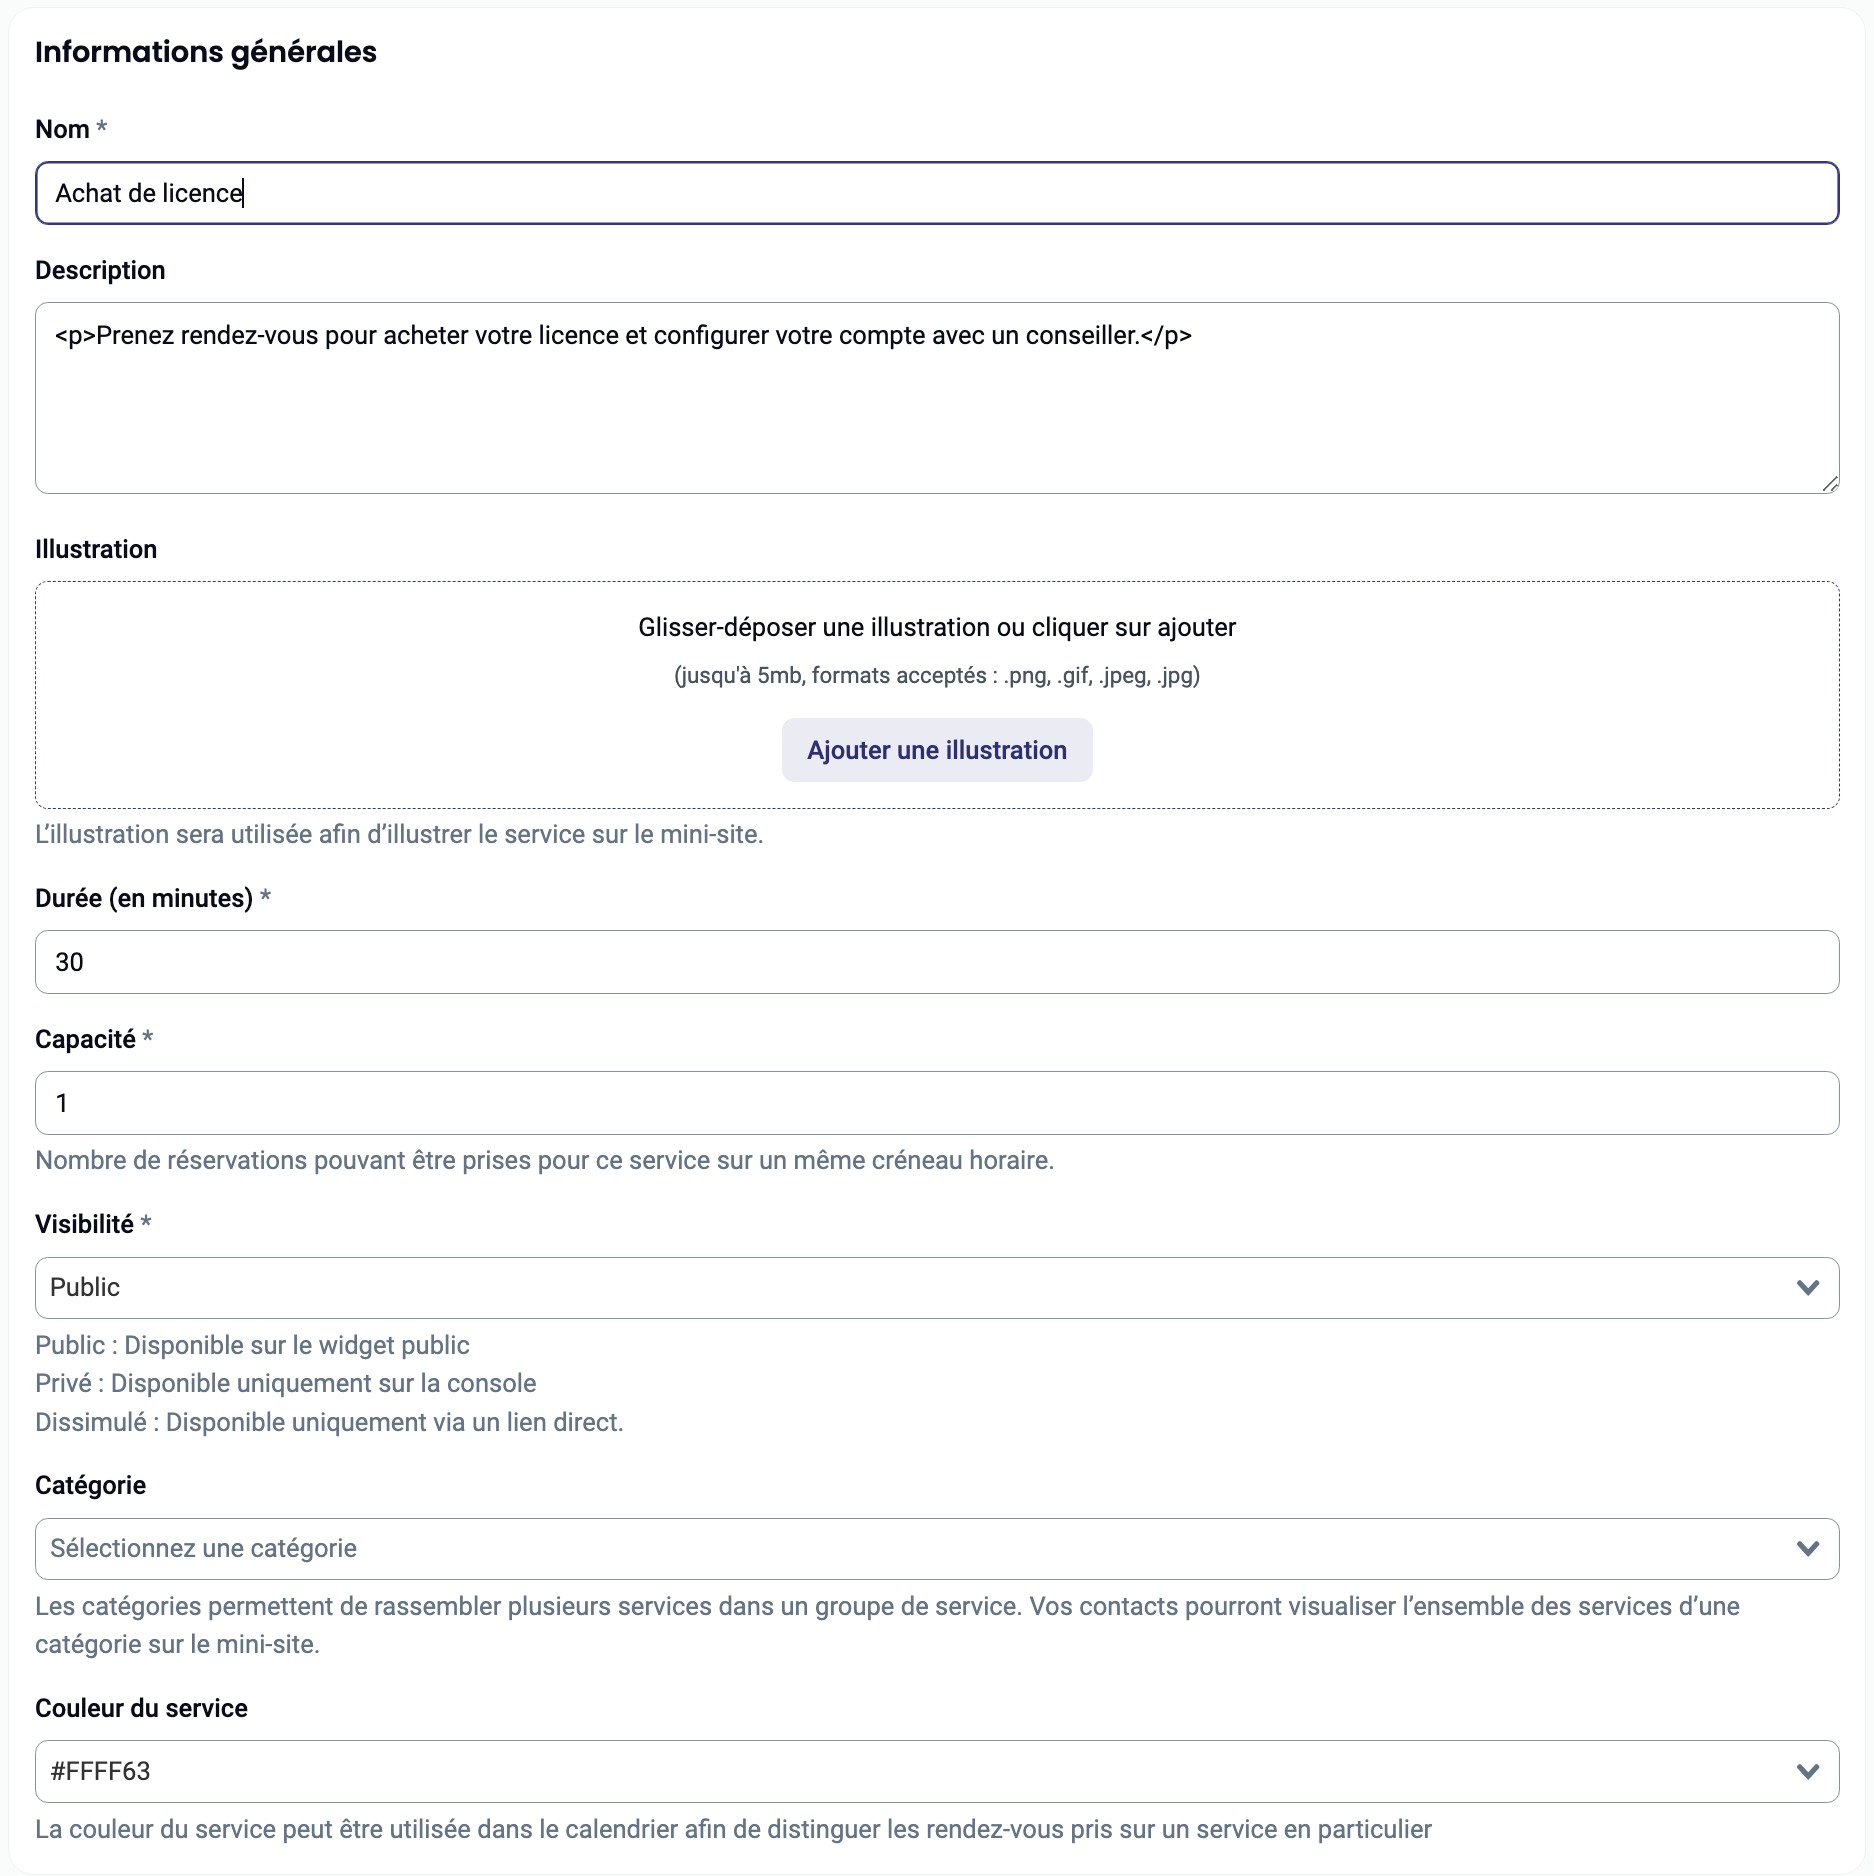
- Name: Give the service a name, e.g. "Buy a licence".
- Description: Provide details about the service, e.g. "Make an appointment to buy your licence".
- Illustration: This will be the image that appears on the widget in .PNG, .GIF, .JPEG, .JPG format, no larger than 2MB.
- Duration: Specify the duration of the service in minutes (e.g. 30 minutes).
- Capacity: Maximum number of bookings per time slot.
- Visibility: Choose whether the service is public (widget and back office), private (back office), hidden (not visible on the widget) or deactivated (not available for booking appointments).
- Category: Assign a category to organise your services in the appointment booking widget.
Service Locations

Define the address where the service will be offered as :
- the establishment address
- by videoconference
- by telephone
- a personalised location.
Service price

You can define a price for the service if it needs a payment.
Danger zone

Please note that deleting a service is irreversible and results in the deletion of all objects associated with this service.
Managing collaborator in charge of a service in Agendize
Using this feature, you can easily manage the staff responsible for providing each service, ensuring smooth organisation and better availability management.
If you need any further assistance, please do not hesitate to contact our support team.
A service is considered available when at least one of the selected collaborators is available for the specified duration.
Available options
Add a colleague: Click on the "+" icon at the top right of the screen to add a new collaborator to the list.
Search for a colleague: You can search for a collaborator by surname, first name or email using the search bar at the top of the screen. This makes it easier to find a specific collaborator when the list is long.
Select or deselect individually: Each member of staff is displayed with a tick box. Check or uncheck the box to individually select or deselect each member of staff and remove them from the department.
Remove an employee: Click on the "X" symbol to the right of an collaborator's name to remove them from the list of collaborators in charge of the department.
Example of configuration
In the example above :
- Jacques Ouzi and Teddy Moitout are available collaborators to provide the service.
- You can choose to select one or both of them for this specific service.
Importance of this configuration
Correctly allocating collaborators to departments ensures that contacts can only book slots when the collaborators concerned are available. This avoids scheduling conflicts and improves contact's satisfaction by optimising availability management.
Configuring service timetables in Agendize
The schedule management screen allows you to define appointment intervals and customise opening times for a specific service.
Use this screen to fine-tune the availability of your services according to your operationnal requirements.
If you need any furter assistance, please do not hesitate to contact our support team.

Appointment booking interval
Activate the option to define a specific interval during which appointments can be booked (e.g. from 6 hours to 6 months).
Customised timetables
- Activate and define the availability periods per day (or use the closing option). This setting will apply to every day of the year.
- Add specific times for specific dates using the "Add specific times" button. You will be able to define day-by-day or period-by-period times when you will authorise your contacts to make appointments for this service. Please note that the times at which the service is available will also depend on the times set for the staff in charge of the service.
Configuration of preparation and buffer times for a service in Agendize
This screen lets you define the preparation and buffer times for your appointments;
These settings enable you to manage your time more effectively and ensure a smooth transition between appointments.

Time to prepare
- Preparation time : Set aside some time before the start of the appointment to prepare (for example, 15 minutes).
Follow up time
- Follow-up time : Book time after the appointment to follow up or complete administrative tasks.
Configuring appointment validation in Agendize
This screen allows you to define how appointments are validated for a given service.
Use this setting to adapt the booking process to your operational needs.

Validation method
Validation settings: You can choose between automatic or manual validation of appointments.
- Automatic: The appointment is validated immediately after booking.
- Manual: Validation is carried out by the collaborator or the manager, allowing better control.
Setting the cancellation time for a service in Agendize
This screen lets you set the maximum cancellation time for appointments.
This setting allows you to better manage resources while offering flexibility adapted to the needs of your contacts.

Cancellation delay configuration
- Enable cancellation delay : Enable the option to allow cancellations to be managed.
- Define delay: Choose a maximum delay (in hours) before the appointment during which a cancellation is allowed (for example, 24 hours)
Use of the external reference in Agendize
The "External Reference" section allows you to associate an External Identifier (ID) with a service in Agendize. This is particularly useful when integrating with third-party systems or tracking specific services via external tools. This option facilitates interoperability between Agendize and other management platforms.

Field: external ID
- External ID : Enter a unique identifier that will be used to map this service to an external reference in your system.
Was this article helpful?
That’s Great!
Thank you for your feedback
Sorry! We couldn't be helpful
Thank you for your feedback
Feedback sent
We appreciate your effort and will try to fix the article