Online scheduling · Customer appointments
Welcome to your booking link generator! No need to be a tech expert—just follow these steps. In a few clicks, you will have a personalized link, ready to be shared by copy, email, SMS or QR code.
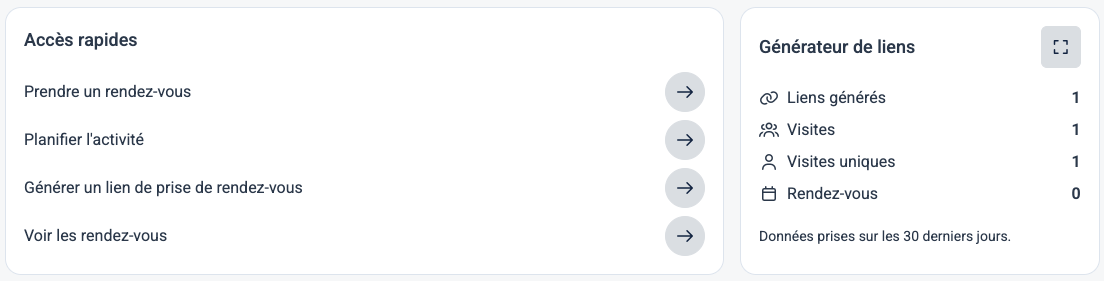
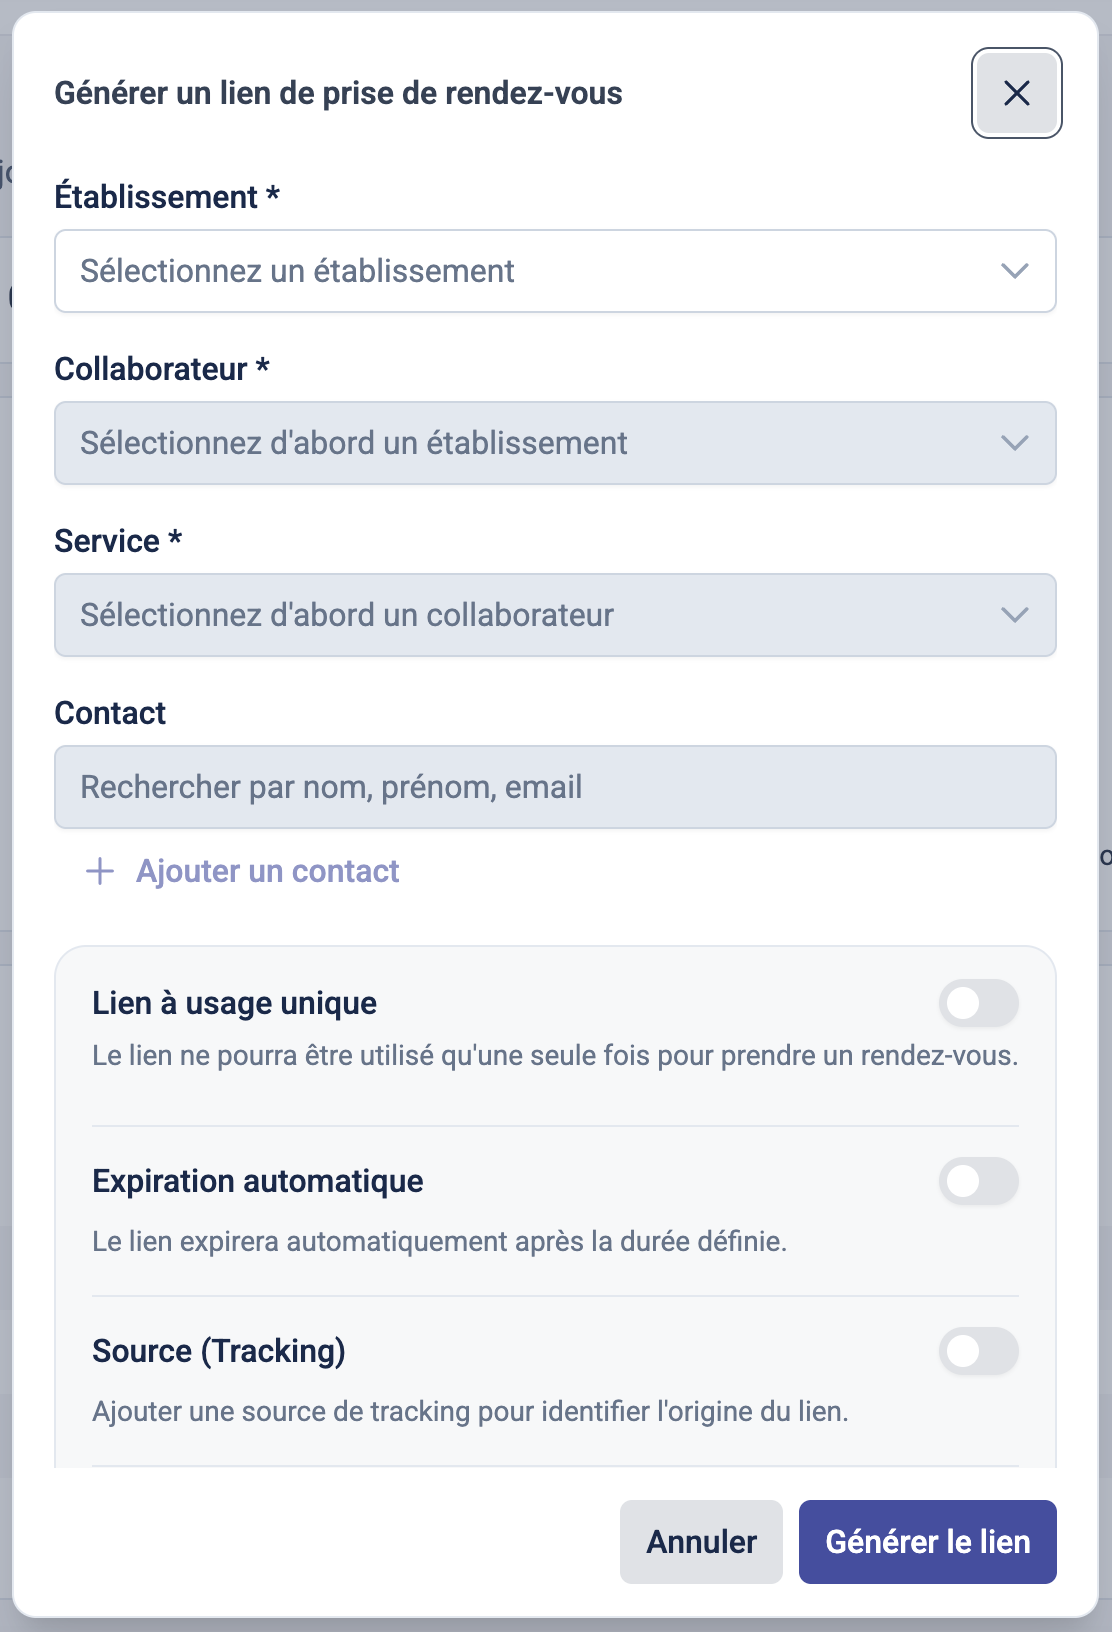
Step 1: Open the generator
Where can you find it?
The generator is available from your dashboard. It brings link creation and link sharing together in a single window.
How to do it:
- From your dashboard, click the "Generate a link" button.
- The generation window opens: every field is gathered there, so you simply work your way down.
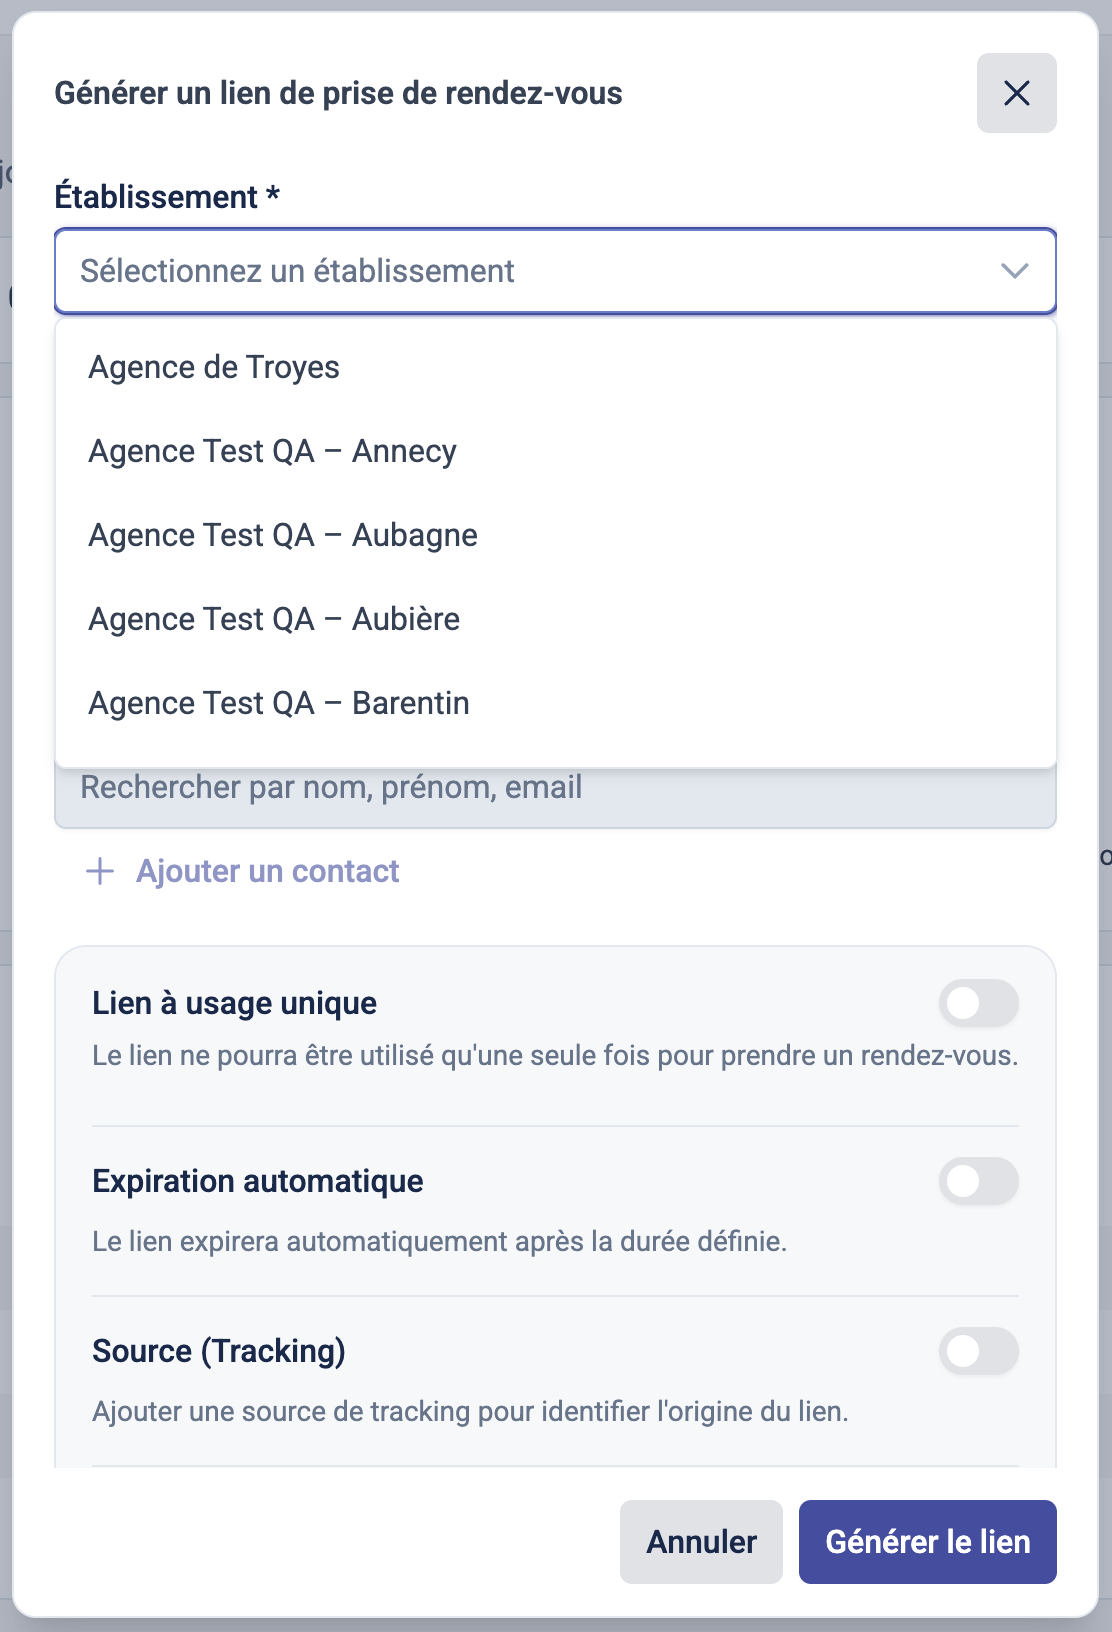
Step 2: Choose your location
What is a location?
A location is your point of service. If you have multiple branches or physical offices, you need to specify which one will be associated with the booking link.
How to do it:
- Open the Location list and select the relevant one.
- If you only have one location, it is already pre-selected for you.
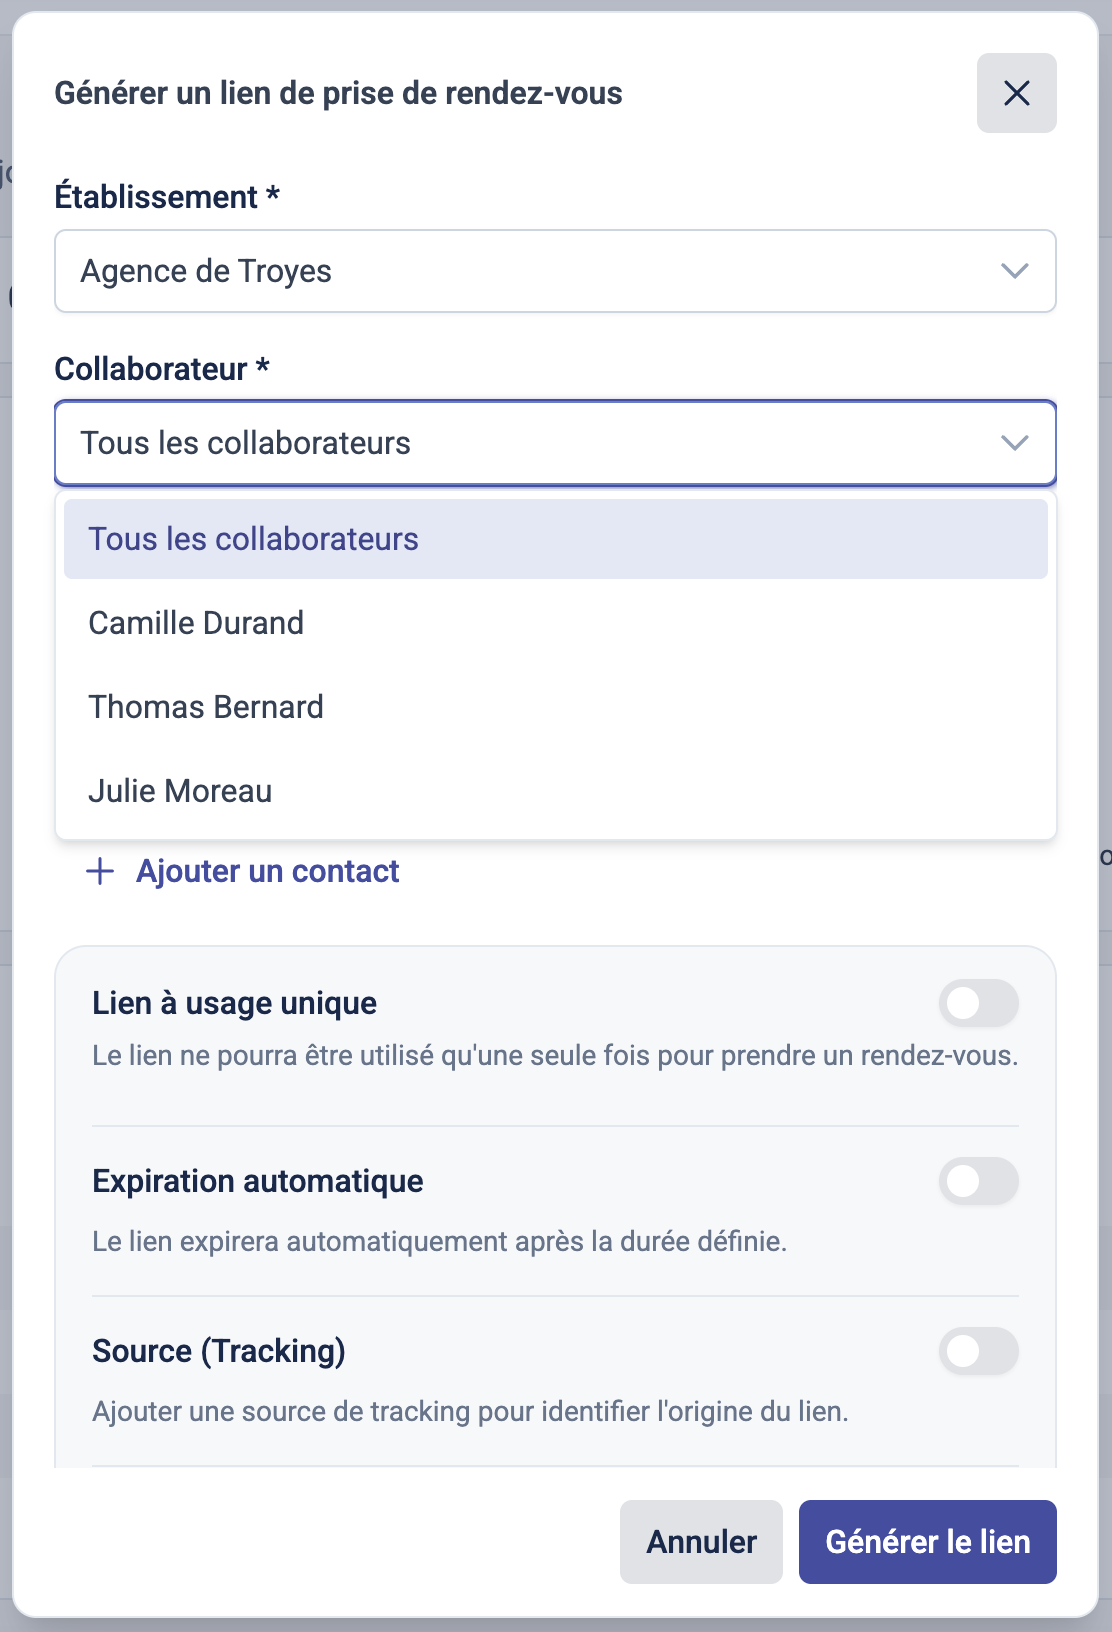
Step 3: Choose a staff member
What is a staff member?
A staff member is the person on your team who will handle the appointment (e.g., "Clément Lejeune", "Nassere Faroka").
How to do it:
- The Staff member list unlocks as soon as a location is selected.
- Leave "All staff members" so the client can choose, or select a specific person.
- If you only have access to your own schedule, your name is already pre-selected.
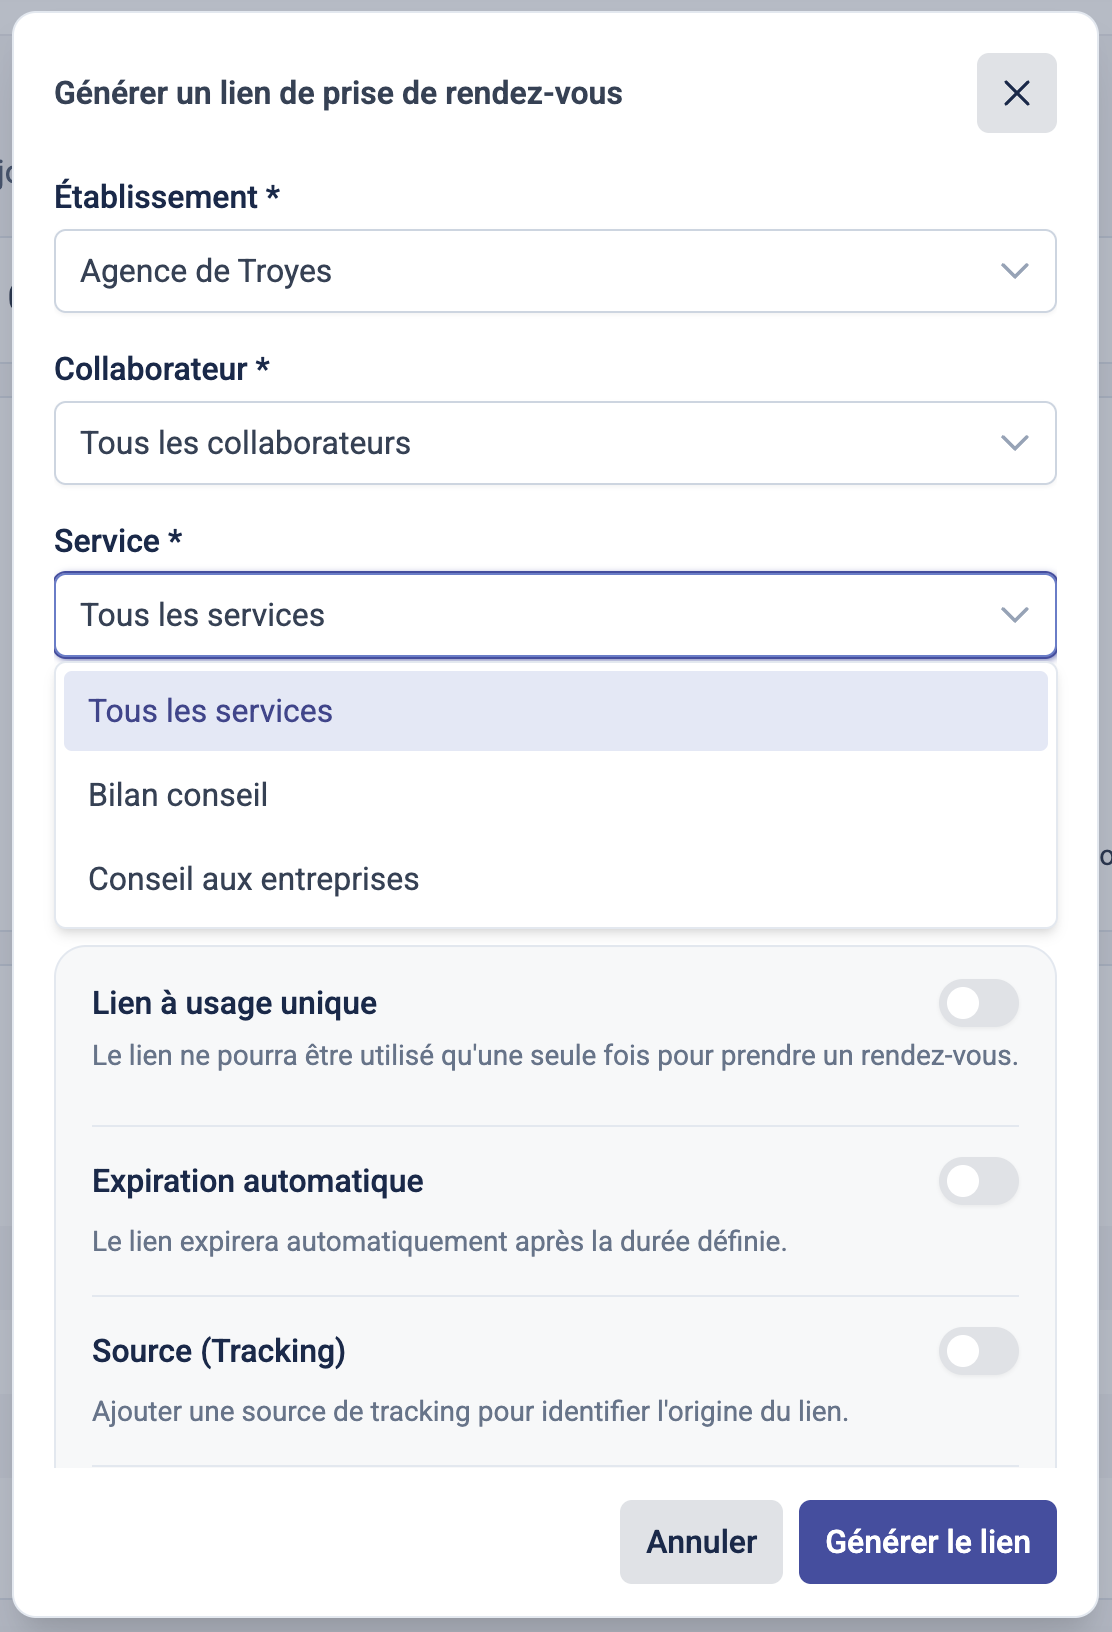
Step 4: Choose a service
What is a service?
The service is the appointment reason you offer to your clients (e.g., "Auto Insurance", "Full Health Check").
How to do it:
- The Service list unlocks as soon as a staff member is selected.
- Leave "All services", or click the service that fits.
- The list only shows the services actually offered by the selected staff member.
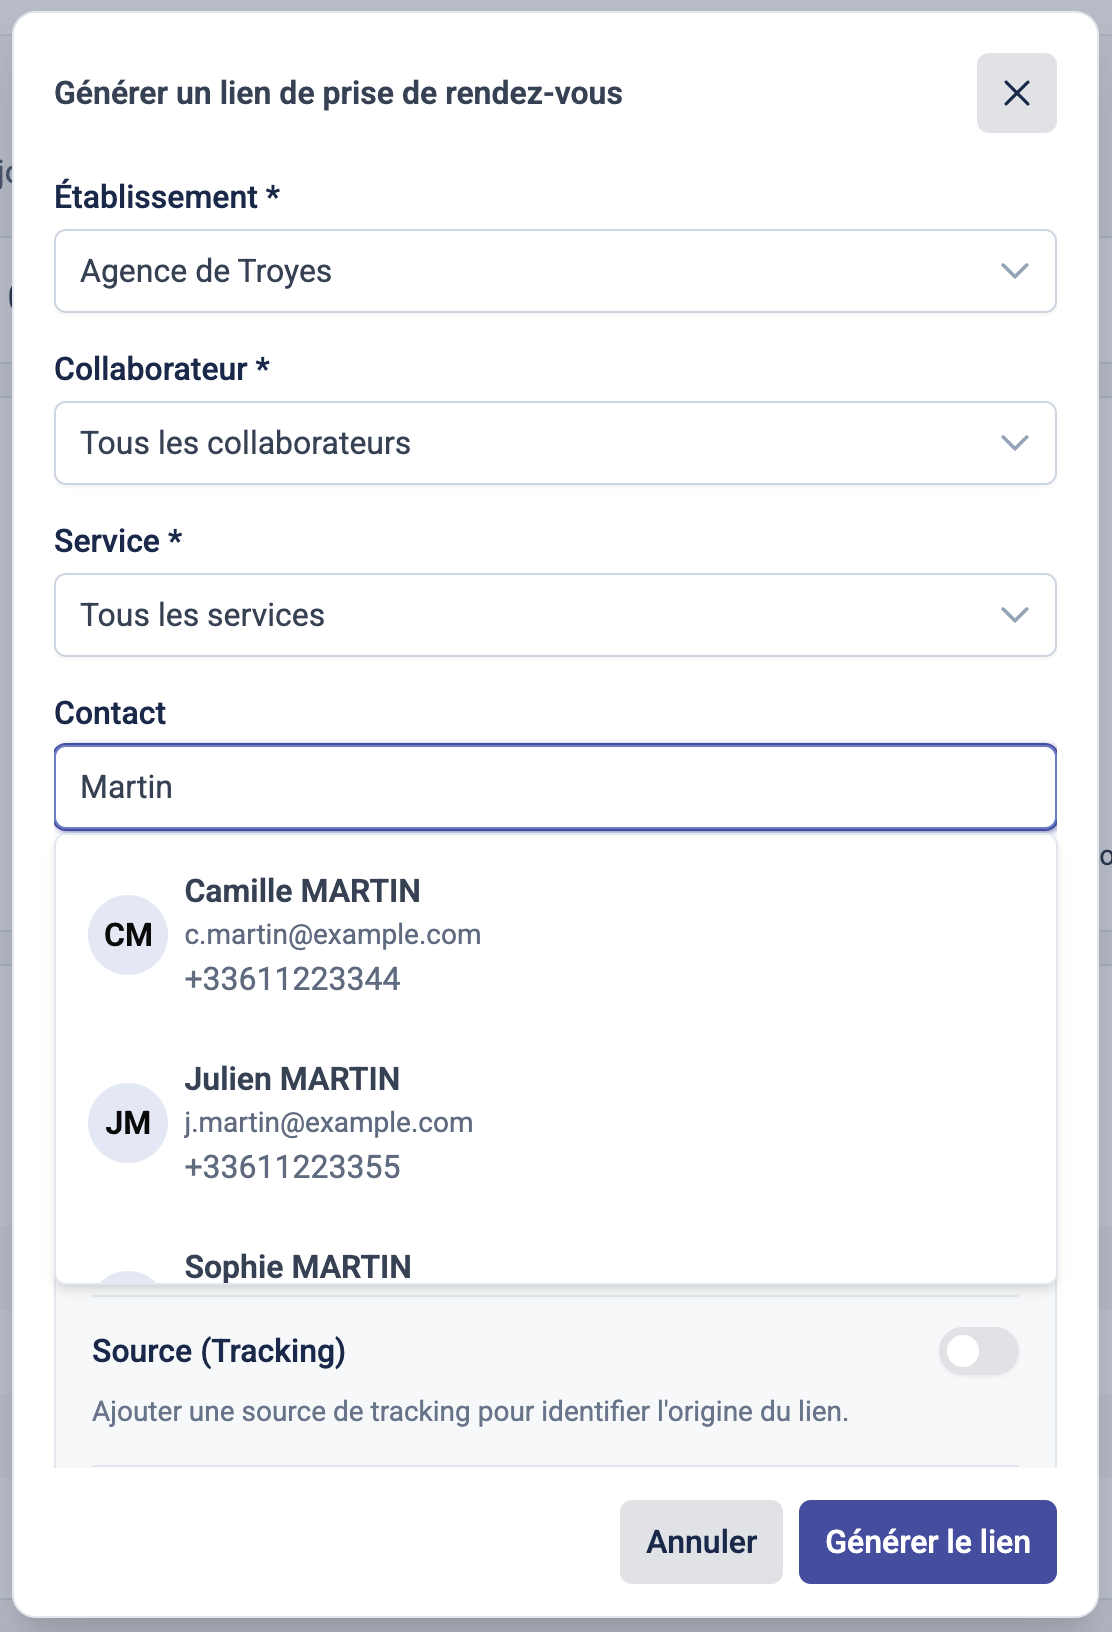
Step 5: Associate a contact (optional)
Why add a contact?
Associating a contact links the link, and then the appointment, to a specific person (client or prospect). It ensures you know who it is for, and it lets you send the link to them directly.
How to do it:
- Type at least two characters in the Contact field to search your existing contacts (first name, last name, email).
- Select the contact from the list of results.
- If no result appears, click "+ Add a contact" and fill in the required fields:
- First name
- Last name
- Phone number
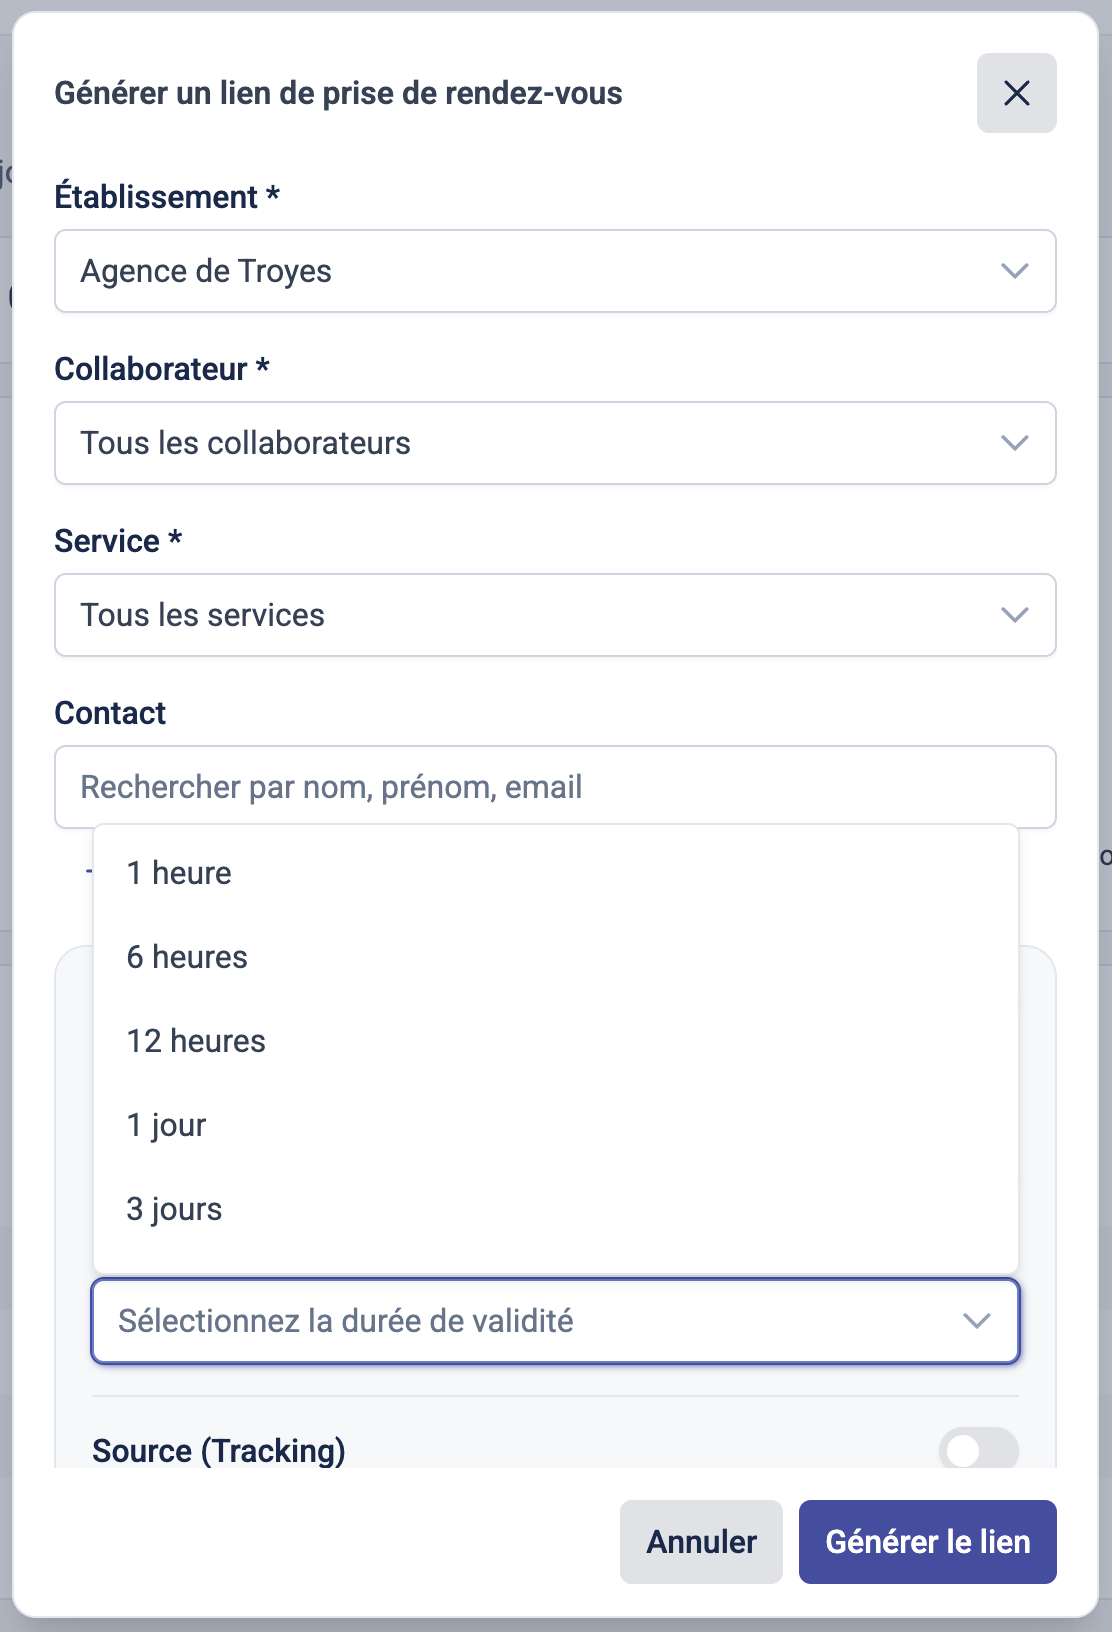
Step 6: Configure the advanced options (optional)
Why these options?
They let you adapt the behaviour of the link to your context: validity period, single use, or source tracking.
How to do it:
- Single-use link: enable the option so the link can only be used for one booking.
- Automatic expiration: enable the option, then choose a validity period. Twelve durations are available, from 1 hour to 2 years: 1 hour, 6 hours, 12 hours, 1 day, 3 days, 7 days, 15 days, 1 month, 3 months, 6 months, 1 year, 2 years. The expiration date is calculated automatically.
- Source (Tracking): enable the option and enter a free-text value to identify where the link comes from (e.g., "GMB", "Website").
- Advanced URL parameters: unfold the "Advanced" section to add your own parameters to the link (e.g., company=ACME).
Step 7: Pre-fill the additional information (optional)
New
What is it for?
If the service asks for additional information (the fields of the form attached to the service), you can fill it in beforehand. The contact finds it already completed when opening the link.
How to do it:
- First select a service (step 4). Until a service is chosen, the section stays greyed out.
- Turn on Pre-fill the additional information. The service’s additional fields appear.
- Fill in the relevant fields. They are all optional at this stage: the contact can complete the ones you leave empty.
Step 8: Offer specific time slots (optional)
New
What is it for?
You restrict the link to a period and to specific time slots, for example to offer a customer three appointments agreed with them. The contact only sees the slots you chose.
How to do it:
- First select a service (step 4). Until a service is chosen, the section stays greyed out.
- Turn on Define specific time slots. The default period covers the next five days, starting tomorrow.
- Adjust the period if needed. Past dates cannot be selected, and the period cannot extend beyond one month from today.
- Open the slot list: every available slot in the period is ticked (“All slots”). Untick everything with the dedicated checkbox, then tick the slots to offer. The search field filters the list, for example on “11:45”.
Step 9: Generate the link
This is the final step!
Once the information is filled in, click the "Generate the link" button. The link is created and the window moves to the sharing screen.
If a required field is empty, a message appears below that field: complete it, then validate again.
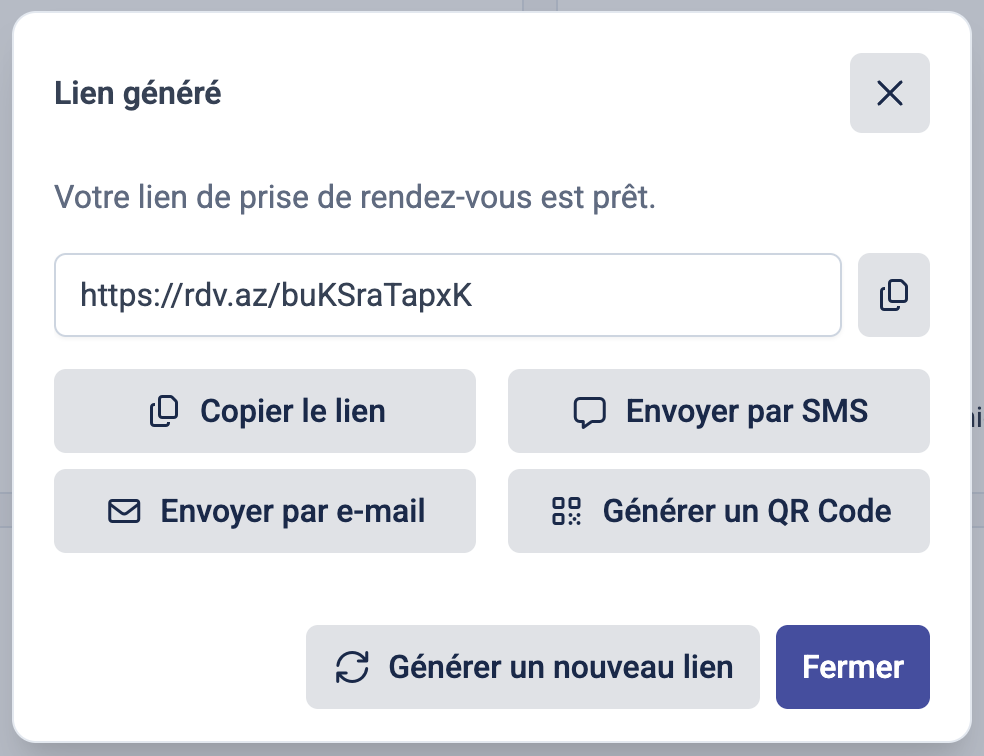
Step 10: Share the link
What are the sharing options?
From the sharing screen, you have four possibilities, without leaving your workstation.
How to do it:
- Copy the link: the link is copied to your clipboard, ready to be pasted wherever you need.
- Send by email: enter one or more email addresses. If the associated contact already has an email, the recipient is pre-filled.
- Send by SMS: enter a phone number. If the associated contact already has a number, it is pre-filled.
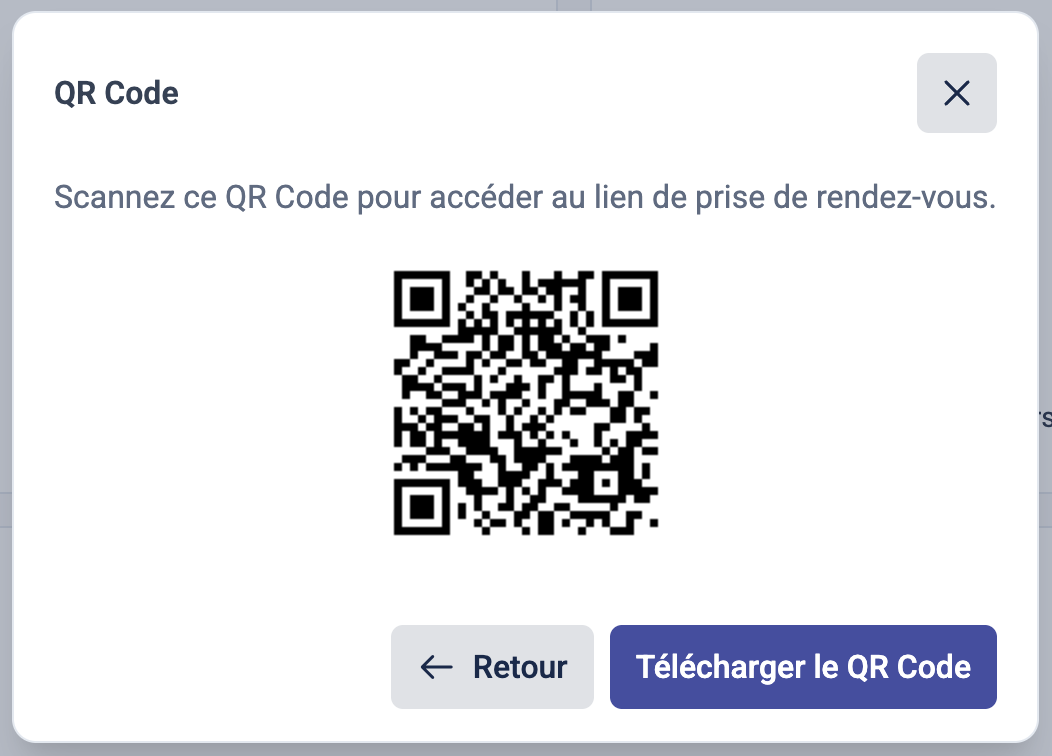
- Generate a QR Code: display the QR code generated from the link, and download it as a PNG image using the “Download the QR Code” button, to print it or show it on screen.
- The “Generate a new link” button lets you start another creation without going back to the dashboard.
Generating a link from a contact record
Why start from the contact record?
It is the quickest route when you are already looking at a client's file: the contact is carried over automatically.
How to do it:
- Open the relevant contact record.
- Click the "…" menu, then "Generate an appointment link".
- The generator opens with the contact already selected and locked.
Tracking your generated links
What is tracking for?
All your links are kept together with their statistics, so you can measure what they actually produced and re-send a link without creating a new one.
How to do it:
- Open the detailed links view from your dashboard.
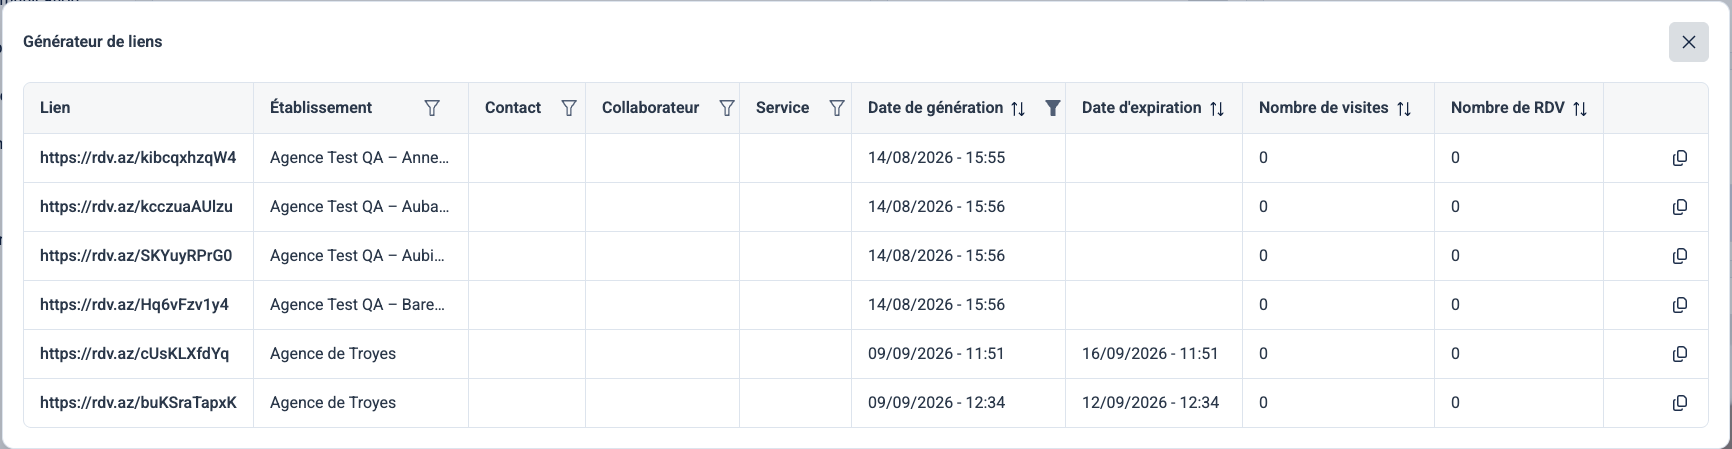
- Review the list showing, for each link: the location, the contact, the staff member, the service, the generation date, the expiration date, the number of visits and the number of appointments booked.
- Filter by location, staff member, service, contact or period, then sort by date, visits or appointments.
- Click the copy icon on a row to retrieve the link and send it again.
- Click the Resend icon on a row to send the link again to its contact. The message content is the one defined in your account’s resend email template.
- Click Export, at the top right of the view, to download the list. The export reflects the active filters and contains the same columns as the table.
Need help?
If you have questions or specific needs, contact us through your client area or open a ticket on Freshdesk.